Quick Start
How to get Sobes Copilot ready for your first meeting in 10 minutes
In a few minutes you can get Copilot ready for your first meeting: set up a context, open a meeting, turn on conversation recording and learn the main shortcuts. After that, it follows the conversation, takes your experience into account and answers questions from voice or from the screen.
1. Create a context
A context describes who you are and how to answer: your role, answer language, resume, technologies, answer format and length. Without a context, the assistant answers generically; with one, it adapts to your role.
- Open Contexts and create a context for the meeting, for example
Frontend ReactorHR interview. - Fill in the fields. The more precisely you describe your role, experience and technologies, the more useful the hints.
- Click Save. A new context becomes active right away, and Copilot will use it in all new answers. If you have several contexts, turn on the one you need with Activate or right in the overlay.
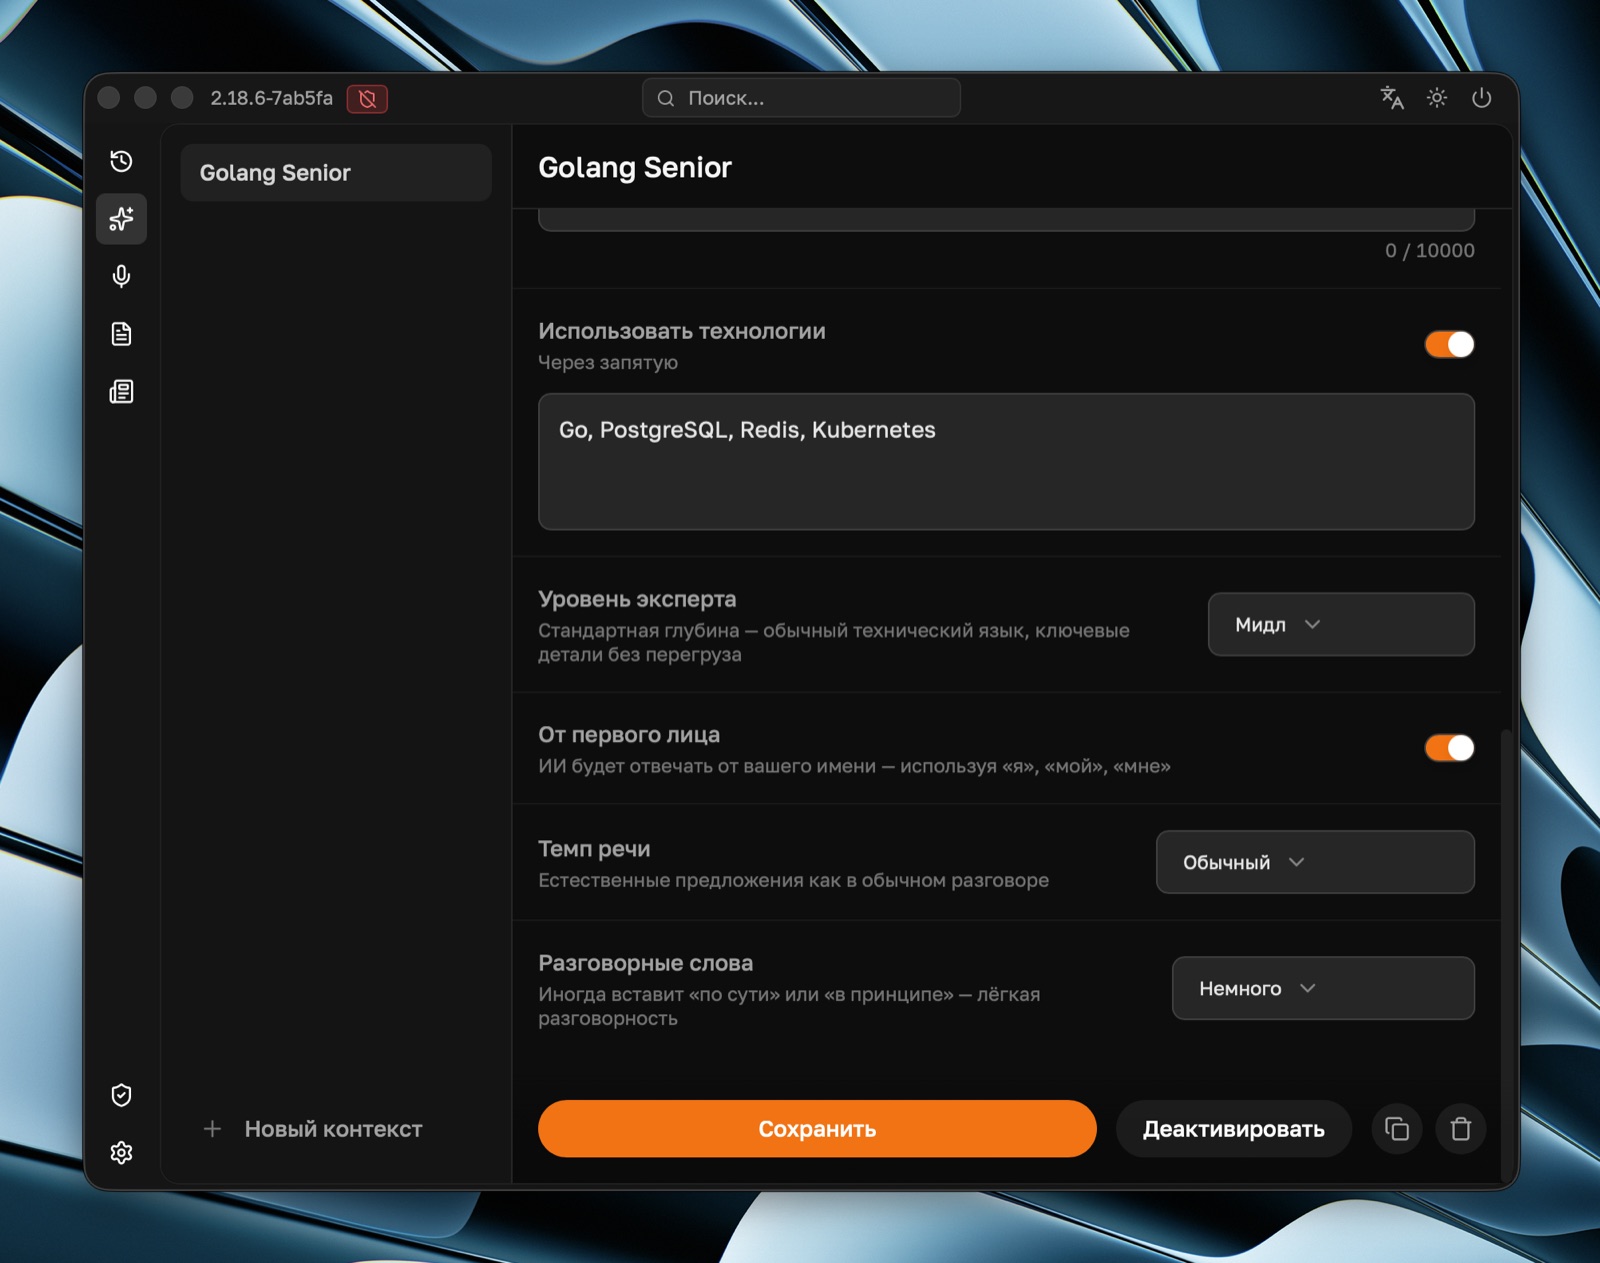
All context fields are covered in the Context article.
2. Create a meeting
On the meetings page, enter a title and click Create. Optionally add the vacancy as a link or as the description text: the assistant will take the role requirements into account, and the meeting will show up in the application tracker. If the process is already in the tracker, pick it in the same place under "Tracker process": the meeting is attached to the card and takes the vacancy from it. The "Notes for Copilot" button (folder icon) lets you pick the note folders Copilot searches in this meeting.
Once the meeting is created, the overlay opens. It's a panel on top of your call where you start recording, send questions and take screenshots. The interviewer doesn't see it when you share your screen.
For an architecture interview, turn on System Design mode in the overlay: a board appears where the assistant draws the system diagram.
3. Turn on conversation recording
The conversation transcript goes into the meeting chat, so Copilot knows what the interviewer asked and what you answered, and you don't have to retype the question. Recording is started with the microphone button or Ctrl/Cmd + R, and the mode is picked in the menu next to that button.
- VAD fits most interviews. Turn it on once at the start of the meeting: the app finds speech on its own and sends phrases for transcription.
- Start / Stop records only between two presses. Choose it if you want to decide what gets recorded.
- One-Shot takes the last seconds of the conversation when you press it. Handy when the question has already been asked and recording wasn't on.
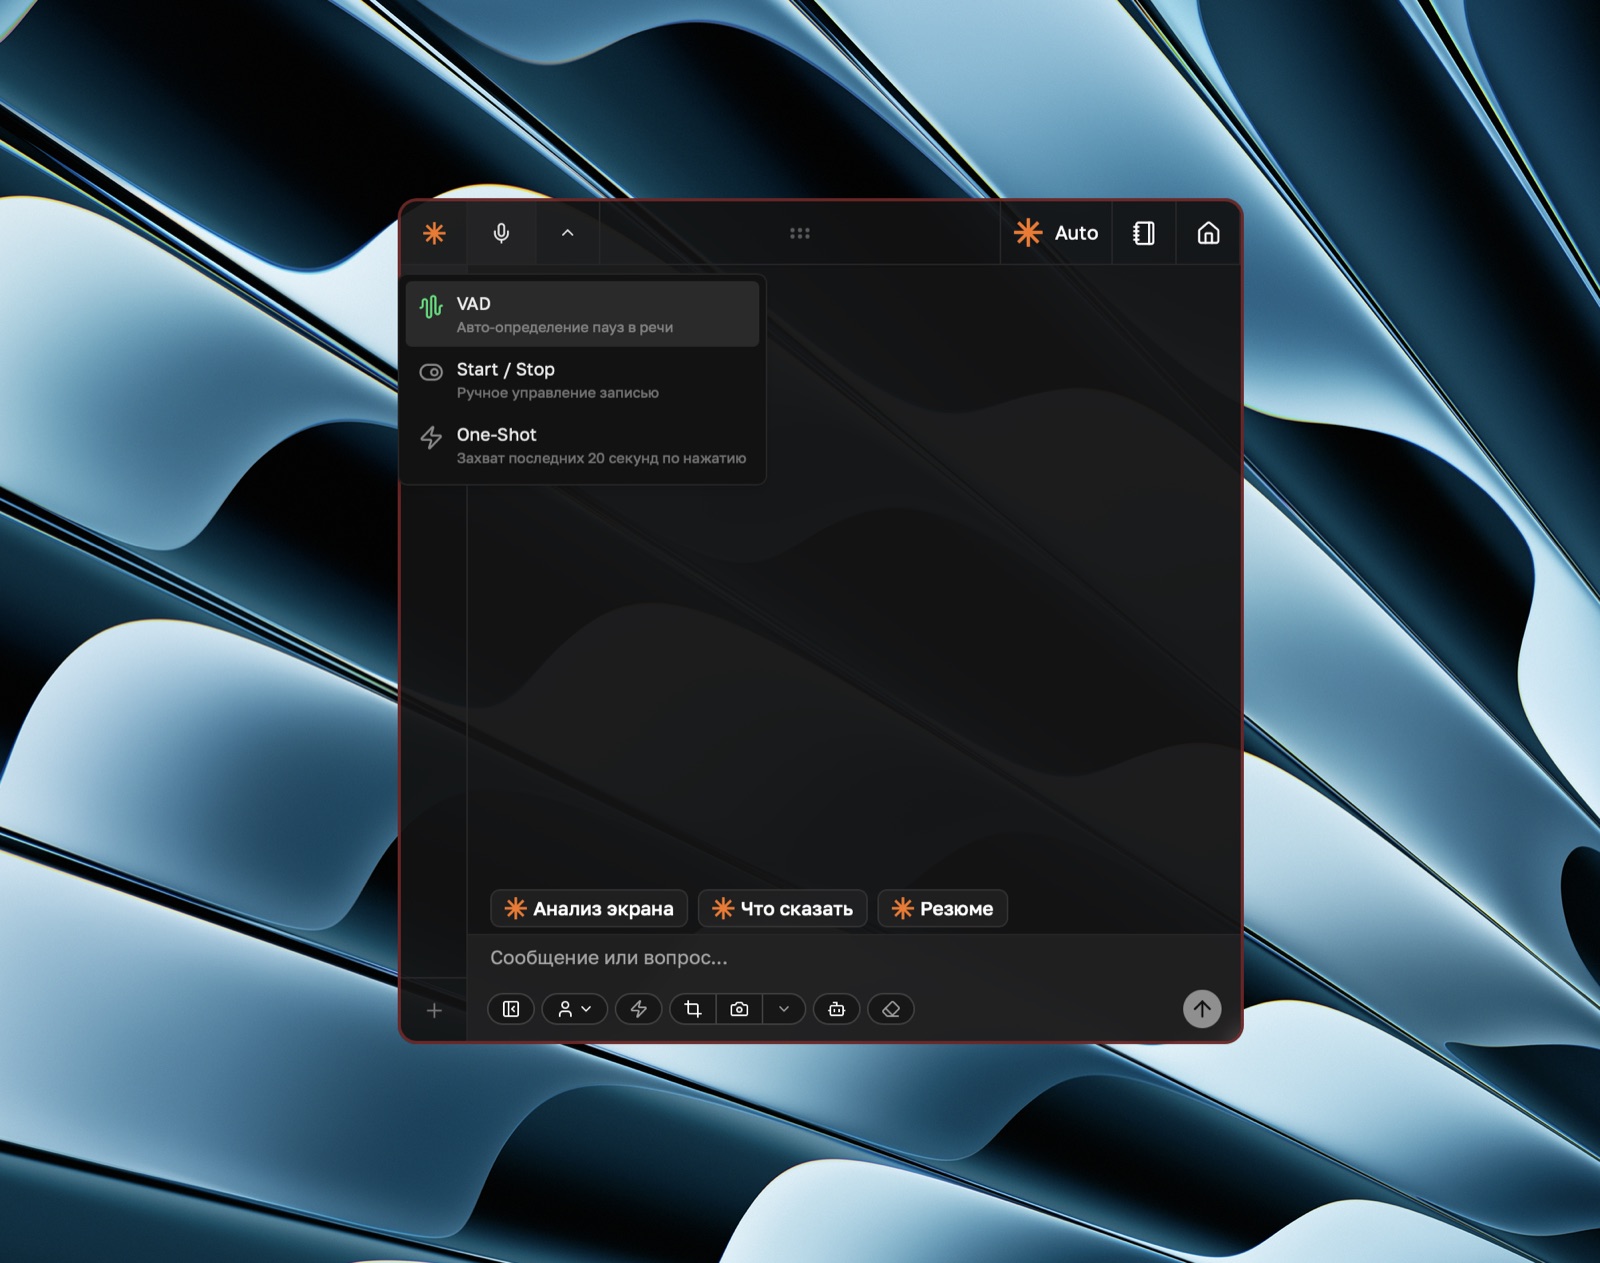
If the interview isn't in Russian, change the transcription language in the same menu, otherwise recognition gets noticeably worse. More on modes and settings: Audio Recording.
4. Learn the main shortcuts
| Action | Windows | macOS |
|---|---|---|
| Hide or show the window | Ctrl + B | Cmd + B |
| Move the window | Ctrl + ←/↑/↓/→ | Cmd + ←/↑/↓/→ |
| Resize the window | Ctrl + Shift + ←/↑/↓/→ | Cmd + Shift + ←/↑/↓/→ |
| Start or stop recording | Ctrl + R | Cmd + R |
| Full-screen screenshot | Ctrl + H | Cmd + H |
| Area screenshot | Ctrl + Shift + H | Cmd + Shift + H |
| Send a request with a screenshot | Ctrl + Enter | Cmd + Enter |
| Send a request without a screenshot | Ctrl + Shift + Enter | Cmd + Shift + Enter |
| Cancel generation | Ctrl + G | Cmd + G |
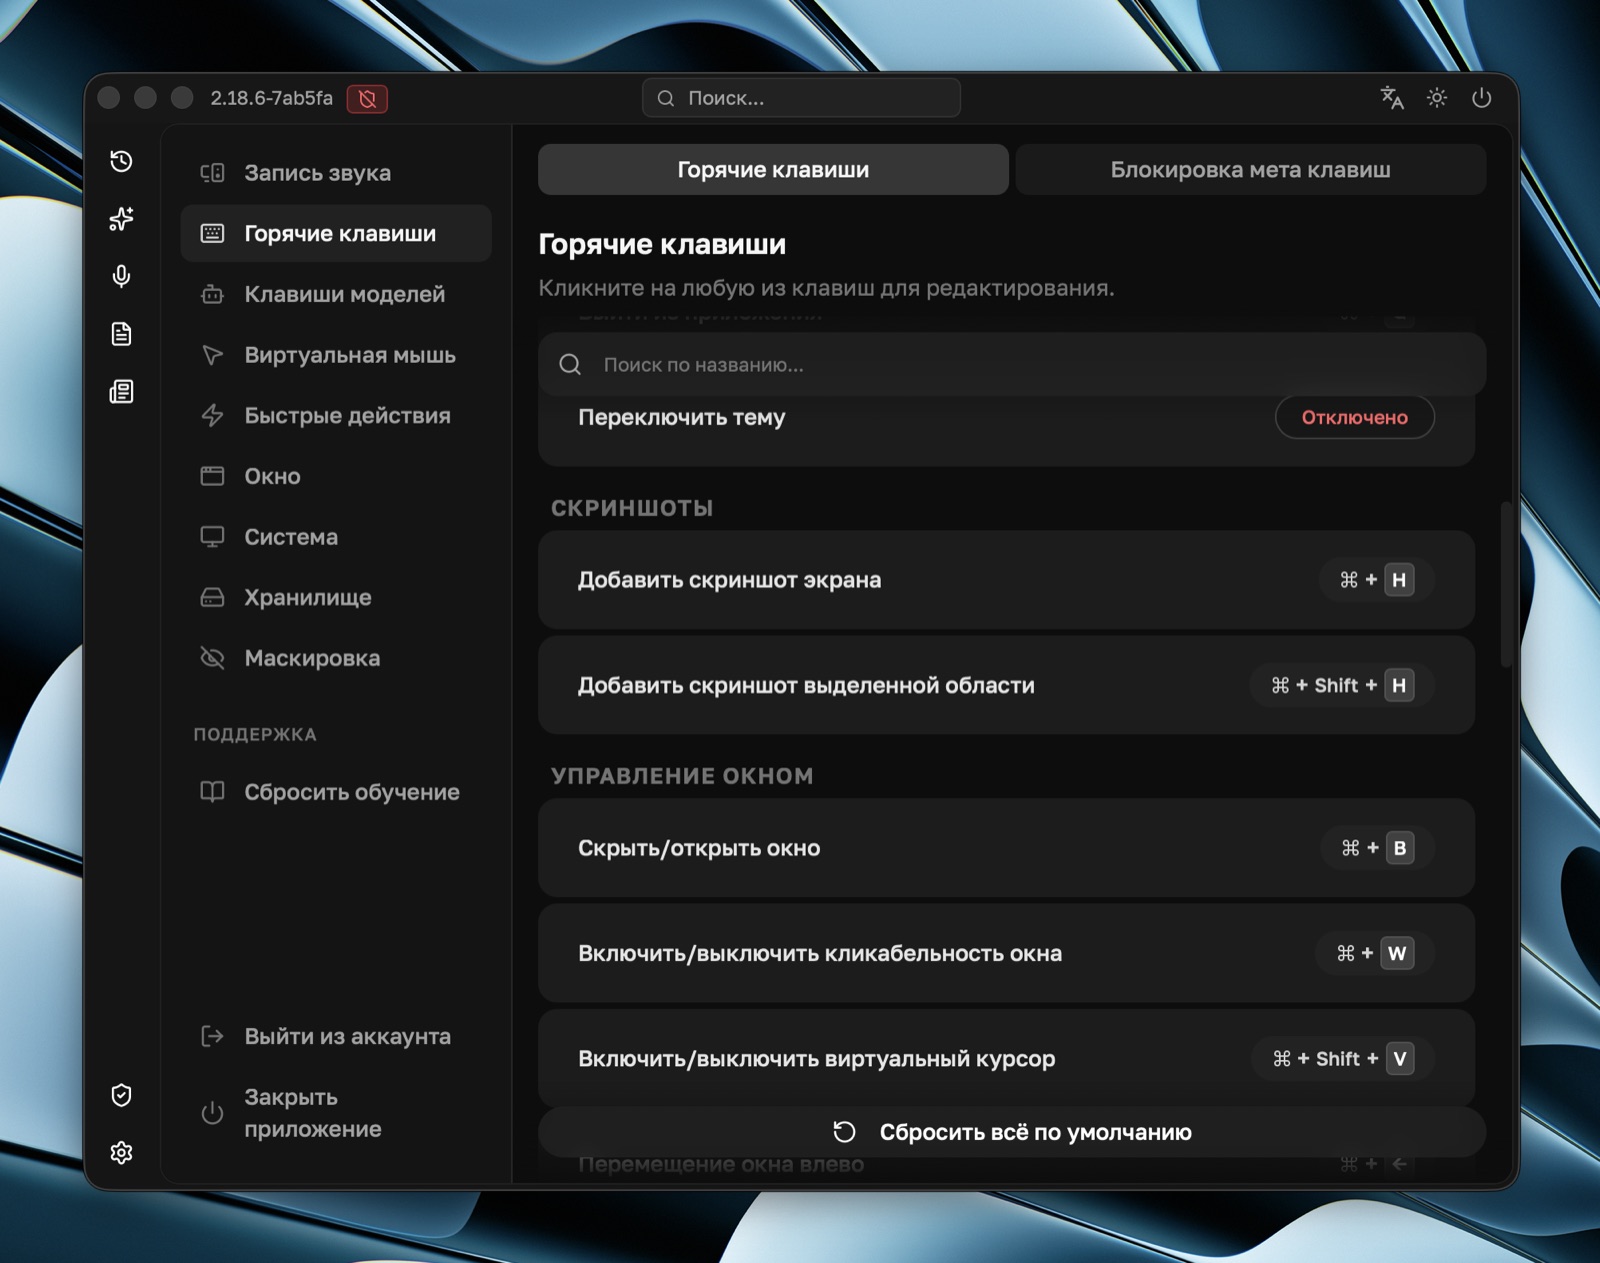
Any shortcut can be reassigned in settings. The full list: Keyboard Shortcuts.
5. Try quick actions
Quick action buttons above the input field send a prompt written in advance, optionally with a screenshot. Three are available right away:
| Action | What it does | Shortcut |
|---|---|---|
| Screen Analysis | Takes a screenshot and helps with what's on the screen | Ctrl/Cmd + 1 |
| What to Say | Suggests how to answer the interviewer's latest question | Ctrl/Cmd + 2 |
| Summary | Briefly recaps the conversation | Ctrl/Cmd + 3 |
In settings you can build your own sets of actions or take a ready-made set for your stack. More: Quick Actions.